 Greetings once again! There was some big news this week; the Primer Missions for the Spartan Games events were released to the public over on The Way Gate. These are close to the final versions of the mission packs that will be used for the various events at Adepticon, which means they are definitely required reading for me as I continue to work on my army lists. As I discussed in my first Adepticon 2017 post, getting my fleet lists down is going to be a big part of my preps, as that will in turn directly inform my “to-do” list for modeling. So, what follows are my thoughts after reading through the primer missions for the two events that I’m participating in, the Schaumburg Prime Offensive FSA tournament and the Schaumburg Clash DW tournament. I’m not going to bother re-posting the gory details of the primer packets here, so if you haven’t read over them yet you might want to go over to The Way Gate and give them a look before reading this!
Schaumburg Prime Offensive Firestorm Armada Missions
Overview
These missions are for the first day of the event on Saturday. That day will consist of 3 rounds lasting 150 minutes and will be played at 900 points. Players will be allowed two lists, and will chose which one to use at the start of the round. That provides some good flexibility by affording players the opportunity to tailor lists a bit to the specific scenario!
Mission 1: Reform The Line
This mission features some very interesting setup and deployment rules, forcing players to start their Admiral’s ship on the table and have most of their fleet off the table in reserve (including units with the Ambush MAR, meaning that you don’t want to bring those to this particular fight!). The main objective here is to have a Tier 3 and Tier 2 squadron within 12″ of the Admiral’s ship at the end of the game. I can see it being very challenging to keep those squadrons alive long enough to complete the objective. It might also be challenging to keep the Admiarl’s ship alive for that long, depending on the Tier 1 choice. On top of that, the tertiary objective requires the Admiral to be alive and still on the table. This mission definitely demands a resilient Tier 1 squadron, thats for sure! For my Terrans, I’m thinking that I will definitely want a Battleship as my Tier 1 choice, and I will need to plan my movement and reserve arrivals carefully to make sure I can get squadrons within 12″ by the end of the game, thanks to my slow Tier 2s. A speed boosting TAC might be helpful in this regard, as well.
Mission 2: Commandeer and Conquer
Ah, the 90’s gaming puns! I love it. This mission’s main objective is a fairly straight-forward battle log competition. The secondary objective requires a player to conduct two successful boarding attacks against neutral battlecruisers that start on the center line of the table. This means this scenario favors factions that have good boarding ability and/or fleet lists that focus on boarding actions. This is an interesting challenge for me, given that Terrans are somewhat Meh at boarding. I’ll have to give this some careful thought! The Tertiary objective goes tot he first player to destroy the opposing admiral’s ship, which might be a challenge. As written, shunting out the Admiral’s vessel could be an effective way to prevent an opponent from scoring this point.
Mission 3: Asset Retrieval
This mission’s main objective is again a Battle Log contest. The secondary objective this time around involves retrieving tokens from one side of the table and getting them to a safe zone. These tokens are worth various amounts of battle log points, so the secondary objective directly influences the primary one in this mission. The tertiary is solely about the value of the tokens retrieved by each player. My first thought is…wow. By my rough calculations, a ship that wants to retrieve the closest token after deploying into one of the normal deployment zones will require a total of 42″ of movement over a minimum of 5 turns. As a result, I think that being successful at this mission’s task will require reserves shunting in, I think. Even then, a squadron will have to cover around 22″ to get a token from its starting place to the safe zone. This will be a challenge for slower fleets like my Terrans, since the ships that will have the best chance of covering the required ground (space?) are our delicate Tier 3s. Ultimately, I think the best bet for me in this mission will be to reserve all of my Tier 3s for the purpose of going in after the objective tokens, and deploying the rest of my fleet and moving it in to act as a blocking force to try and whack my opponents ships as they approach the Safe Zone.
Schaumburg Clash Dystopian Wars Missions
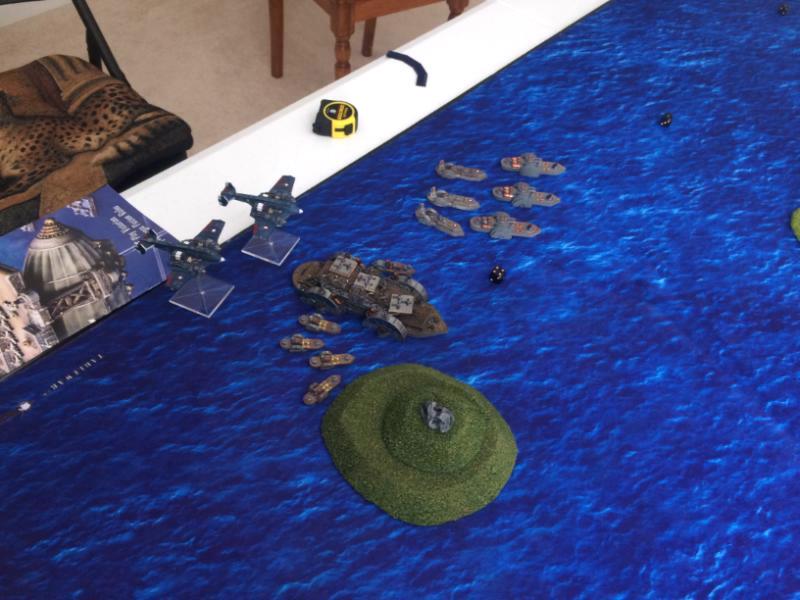
CDR-G’s FSA are on the scene, ready to take the fight to my Prussians!
Overview
The DW tournament will be 3 rounds lasting 150 minutes. Unlike the FSA tournament above, players are being limited to a single fleet list. However, the fact that this one list is allowed to be more than 25% larger in points helps with that loss of flexibility.
Mission 1: Clash on the High Seas
This is a pretty straight forward stand up fight. There are some interesting bonuses for destroying certain elements of the opponent’s fleet while preserving your own, which will be an interesting challenge as my experience tends to show that DW games most often are exercises in mutual annihilation! I am expecting a lot of draws from this round. Given the mission requirements, there isn’t a lot that is pushing me towards a specific fleet build, so options are wide open so far.
Mission 2: Sturginium Veins
This mission is one that I’m looking forward to as a Prussian player! It requires players to earn points by boarding and controlling neutral Sturginium rigs that are placed on the board. The way the description for this mission is worded is a bit confusing; it’s not clear if there are supposed to be 3 or 5 rigs, and if the scoring starts on Turn 2 or Turn 3. However, regardless this mission looks like a good old-fashioned Smash & Grab, which is cool. I think the Russians will probably also be quite powerful in this scenario, given the sheer amount of AP they have at their disposal.
Mission 3: Capture and Control
The third mission is a “king of the hill” style scenario where there are three 12″ diameter circular zones in the middle of the table. Players can control these by having the most points in one at the end of each turn. This scenario will favor fast units to start grabbing those victory points early on, and relatively fast but sturdy units coming in behind them to continue scoring. As a Prussian player, this means I’m going to need to get good rolls for my Tesla generators to boost my larger models into the zones, and I may want to look at forward deploying some units to get them in range of the zones more quickly.
Conclusion
I like what I’m seeing out of these scenarios! They look like a lot of fun to play, and each offers a different tactical problem to solve. I can’t wait to start practicing these with friends! Until next time…