Author Topic: Exploits of the Blazing Sun  (Read 5272 times)

MadDrB

  • Administrator
  • Commander
  • *****
  • Posts: 504
  • Number of Times Thanked: 2
  • "Beat to Quarters!
    • View Profile
Exploits of the Blazing Sun
« on: April 13, 2012, 01:12:14 pm »
I'll post reports of all games I particpate in on this thread.

MadDrB

  • Administrator
  • Commander
  • *****
  • Posts: 504
  • Number of Times Thanked: 2
  • "Beat to Quarters!
    • View Profile
Aaron challenging Nate
« Reply #1 on: April 13, 2012, 01:19:05 pm »
Monday Games:  Nate (KoB) vs. Aaron (EBS)

I met Nate at the GV Monday afternoon and we played a few games using the X-Cam system.  I'd like to use this forum for players to post the results of their own games played in the campaign.

Game 1:  EBS vs. KoB
400 MFV Recon Mission
Clash of Arms scenario
Core Force: Naval

We rolled randomly to place terrain, as the first suggestion in the new DW book, so we had a lot of cool islands in place.  The EBS had an Ika, but otherwise the forces on both sides featured plenty of medium and small ships.


The scout gyros kept their distance, and the ika made one KoB destroyer derelict.  Those tiny KoB corvettes actually sailed across the board, circled around the island in the EBS deployment area, and scooted under the gyros.

EBS destroyed more ships at the end of turn 4.  Aaron earned +5 Recon Points for a marginal victory; both Nate and Aaron earned +2 Recon Points for destroyed opposing ships.

Game 2: EBS v. KoB
400 MFV Recon Mission
Reconnaissance Scenario
Core Force: Armored

Nate deployed his landship, a squadron of medium tanks, and two squadrons of small tanks in the center of the board; Aaron brought on a single squadron of 3 Inari scout gyros supplemented by small tanks.  And as I write this I realize I didn't follow the standard for the Core Force as Armored since at least 50% of my force should have been land units.

The scout gyros took good pictures of the KoB landship and swiftly exited the board.  Aaron took another +5 points for success, and each took +1 Recon point for opposing models destroyed.

Running Campaign Point Totals:
Aaron (EBS): 13 Recon Points
Nate (KoB): 3 Recon Points


Game 3: EBS challenging KoB
800 MFV Strategic Mission
Gauntlet Scenario
Core Force: Naval

I immediately spent 10 Recon Points to challenge Nate to play a Strategic level game.  I rolled the Gauntlet scenario, and we set up the board and our respective fleets.  It was clear by the end of turn 1, however, as the KoB dreadnought made a collision coarse heading toward the Japanese dreadnought, and KoB medium models were wrecking havoc with the pair of gunships I was moving in flanking formation beside the EBS dreadnought.  I needed to leave sooner than I had anticipated, and seeing no win in sight I conceeded the game.  Each of us earned 1 Recon and 1 Strategic point each.


So, at the end of the afternoon we had each effectively earned the same number of campaign points.

Aaron (EBS): 4 Recon, 1 Strategic
Nate (KoB): 4 Recon, 1 Strategic
« Last Edit: April 13, 2012, 02:06:15 pm by MadDrB »

MadDrB

  • Administrator
  • Commander
  • *****
  • Posts: 504
  • Number of Times Thanked: 2
  • "Beat to Quarters!
    • View Profile
Thursday Game: Aaron vs. Kyle
« Reply #2 on: April 13, 2012, 01:20:36 pm »
Location: Culpeper Gaming Parlour
Setting Location:  along the banks of an Indonesian river
Players: Aaron (EBS) challenging Kyle (CoA) 
Mission Size: Recon MFV: 450 (I spent 1 Strategic Point to increase +50)
Mission Type: Clash of Arms
Core Force: Armored
Terrain: buildings and bridges spanning a river
Accumulated Campaign Points
 * Recon:  8/2
 * Strategic: 0/0
 * Control: 0/0


Kyle set up his Covenant forces on one side of his deployment zone, featuring a shiney new Time Orb which came straight from the factory and hadn't even been painted yet.  I took the picture to compare the scale to the buildings and medium tanks because I had only seen the waterline Orb model on the table before, and I was impressed by the size of this model... and those legs!  Clearly we did not score the bonus Recon points for deploying painted models.

I openly bid my single Strategic Point to increase the MFV because both of us wanted to play a slightly larger game but didn't have time to complete 2 games in the evening.  I realize now that we also fudged on the X-Cam structure of force composition because each of us had 2 large models in our respective forces.

I set up a bunker on the river bank in the middle of my deployment zone, supported by a large walker and a war gyro along with a nominal squadron of tanks.  The Covenant forces (large walker, battleship, pair of bombards, and Time Orb) set up and were clearly determined to move toward my bunker emplacement and tear apart the Imperial forces.

Turn 1 saw the CoA battleship teleported into the middle of the river only 4 inches in front of the bunker, lining up the particle projector canon with the large walker as well.  But fortunately I had an activation BEFORE the battleship could activate, and I moved the large walker to open up fire with 13 AD from the main turret at RB1; the resulting critical hit came up boxcars and the battleship promptly was relocated 9" to the port side.  Kyle activated the battleship and moved back into a firing position with the particle projector canon... only to roll a bunch of "one" and "two" results on his dice, inflicting only a single point of damage on the bunker; and the battleship's turrets proved absolutely ineffective against any of my tanks.  My tanks managed to score a 2nd critical hit on the battleship, causing a Half AD effect.  I finished the turn by moving the war gyro toward the battleship to set up a bombing run for the following turn, and I fired turrets and rockets at the Time Orb and Covenant tanks, scoring another critical hit which teleported a bombard directly into the river.

Turn 2:  I won initiative and moved the war gyro into position to bomb the CoA battleship.  Another critical hit (the 4th in a row) against the battleship finished it off before it had a chance to activate a second time in the game.  And the war gyro's turrets inflicted a hard pounding on the giant walking crab. 


At this point Kyle lost all wind from his sails and saw no practical way of countering my excellent attack dice rolls with his miserable attempts (he rolled a total of 1 "six" in all of his attacks up to this point in the game, and his AA just couldn't manage to shoot down my rocket attacks), so he agreed to concede if I would allow an exception to the rule that he could teleport his giant crab to land on top of my war gyro.  He then proceeded to do just that, and we rolled for an epic boarding action in the sky!


Kyle finally managed to roll a bunch of sixes, and the boarding action ended with both of our large ships derelict.  But with smoke pouring from the raging fire on his Time Orb and only a bombard left to fire at my large walker and bunker (not to mention the still undamaged tanks), he conceeded defeat.

Scores:
Aaron: +5 Recon for victory, +4 Recon points for more than 300 VP in destroyed and derelict enemy models (battleship, giant crab, bombard)
Kyle: +2 Recon Points for 150 VP for the derelict war gyro
« Last Edit: April 13, 2012, 02:05:28 pm by MadDrB »

MadDrB

  • Administrator
  • Commander
  • *****
  • Posts: 504
  • Number of Times Thanked: 2
  • "Beat to Quarters!
    • View Profile
Re: Exploits of the Blazing Sun
« Reply #3 on: April 17, 2012, 07:23:43 pm »
Location:  The Game Vault
Setting Location:  Sea of Japan - an EBS squadron pursues a rogue EBS fleet
Players:  Aaron (EBS) challenging Jack (EBS)
Mission Size:  Recon MFV 400
Mission Type:  Reconnaissance
Core Force:  Naval
Terrain:  None

Accumulated Campaign Points
 * Recon:  2/8
 * Strategic:  0/0
 * Control:  0/0

Jack set up a mixed force of battleship, pair of cruisers, and a squadron each of frigates and corvettes, all deployed in the center of the table space.  I led a pair of Inari from the edge nearest to the battleship, the guns remaining silent to spend an action to photograph the nearest corvette, which was successful, while the rocket battery launched a salvo against the battleship.  During my next activation I moved a full squadron of five corvettes directly toward the battleship, moving them into RB1 to make a fully linked attack which put some damage on the battleship.  Jack chose to move the battleship toward my Inari, leaving his own corvette squadron to grapply with mine, a good decision because the primary guns of the battleship were not having any luck hitting the small, elusive corvettes.

By turn 3 the Inari had taken a partially successful photo of the rogue battleship, but they both took damage from the capital ships, both the battleship and cruisers launching successive attacks against the medium flyers.  The only reason my flyers lasted into turn 4 was because of Jack's limited rolls of sixes, but my rolls were not much better, and in the end one Inari was destroyed in a fiery wreck and the other severely damaged, and my corvettes and frigates were absolutely destroyed.

Jack won the mission, defeated my advanced recon force, earning +5 Recon Points in addition to +3 Recon for earning more than 200 VP for my damaged and destroyed ships.  I earned +2 points for destroying most of his corvettes and frigates.

MadDrB

  • Administrator
  • Commander
  • *****
  • Posts: 504
  • Number of Times Thanked: 2
  • "Beat to Quarters!
    • View Profile
Re: Exploits of the Blazing Sun
« Reply #4 on: May 20, 2012, 01:30:30 am »
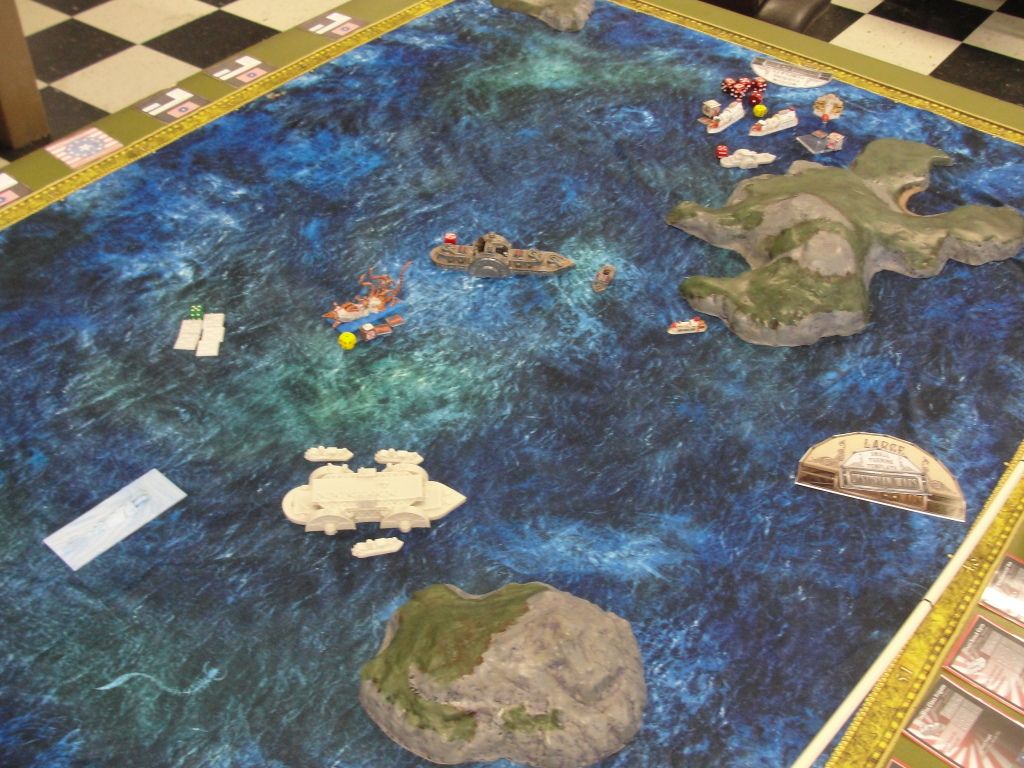
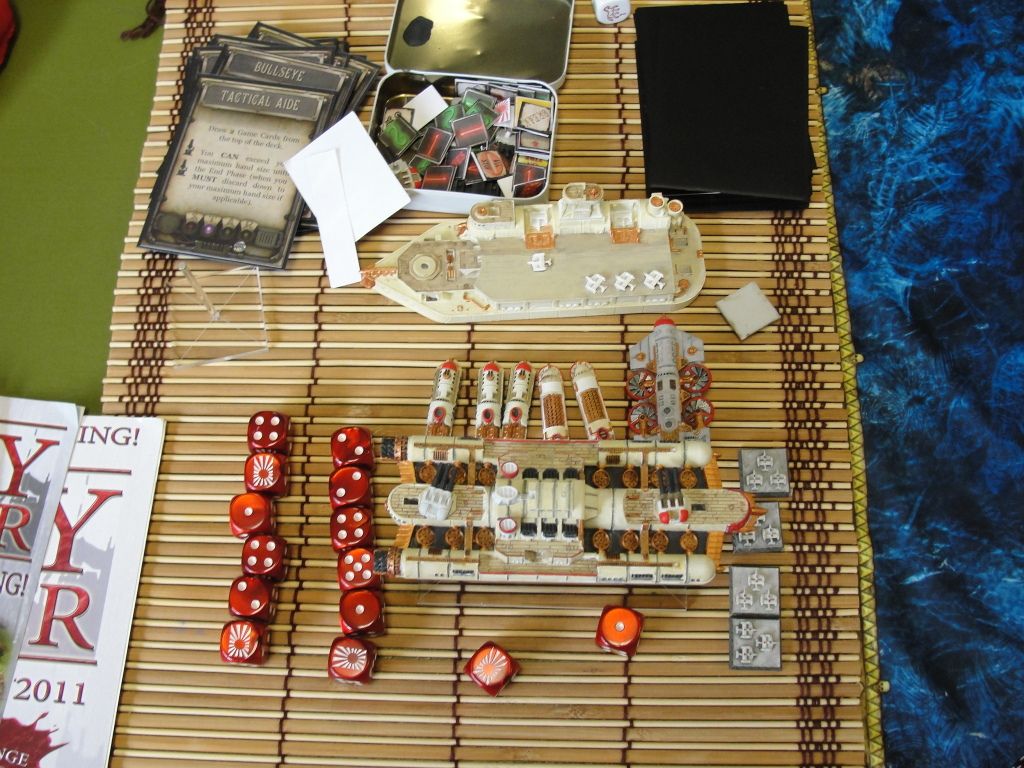
FSA fleet stationed off the coast of Ecuador was dispatched to investige reports of an Imperial force operating in the region.  The Blazing Sun battle group centered around the Kiyohime carrier Noto with a Tsukuyomi War Gyroin support along with escorts & frigates.  (Naval Core Forces with approximately 820 points in each.)


Under clear skies the two forces spotted each other near some small islands and immediately closed the range.  The FSA fleet, centered around the Dreadnought FSS Enterprise, also included a Saratoga class carrier and several squadrons of surface craft including destroyers, escorts, corvettes, and a pair of gunships.  The Americans opened fire first with ranging shots and the Imperial War Gyro turned to starboard to bring both turrets and the full port broadside of rockets to bear on the Enterprise.  Unfortunately, at least for the "Unfortunate" Dragon War Gyro, several rockets which struck the sides of the Dreadnought failed to explode.  A certain Japanese rocket battery lieutenant may or may not have checked to make sure the rocket warheads were armed.


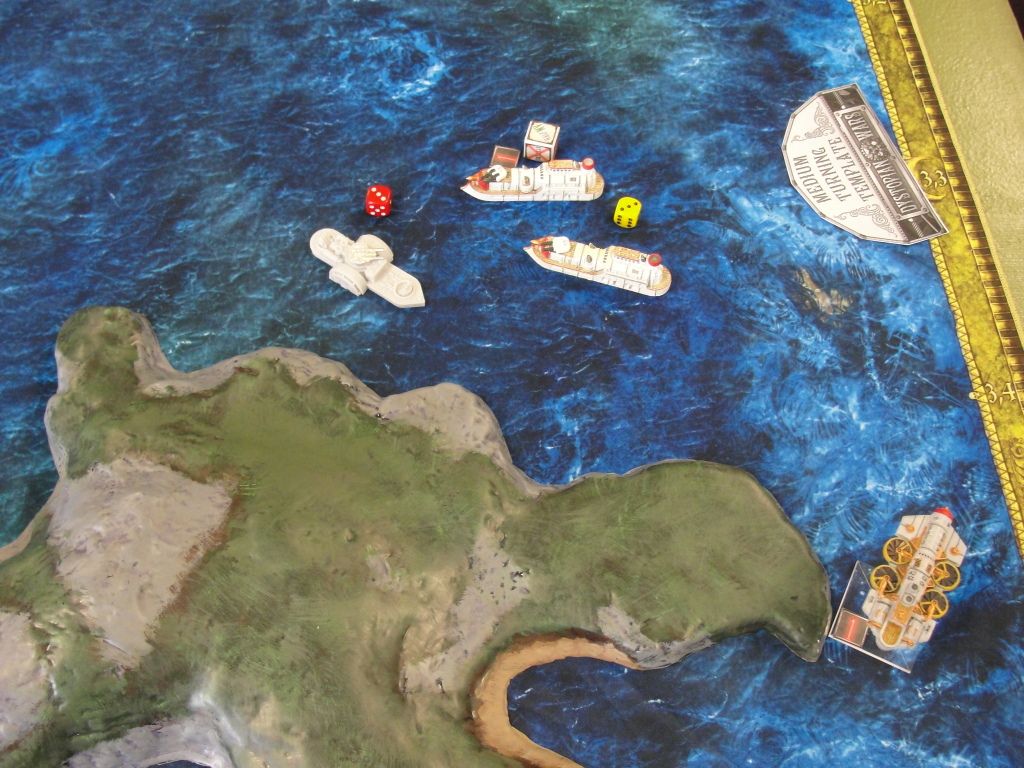
Around the east side of the islands, however, an Imperial gunship squadron moved into flanking position.  They may have managed to move in close to the FSA fleet undetected if not for the pair of Inari Scout Gyros following and launching rockets which attracted attention from the American gunships.


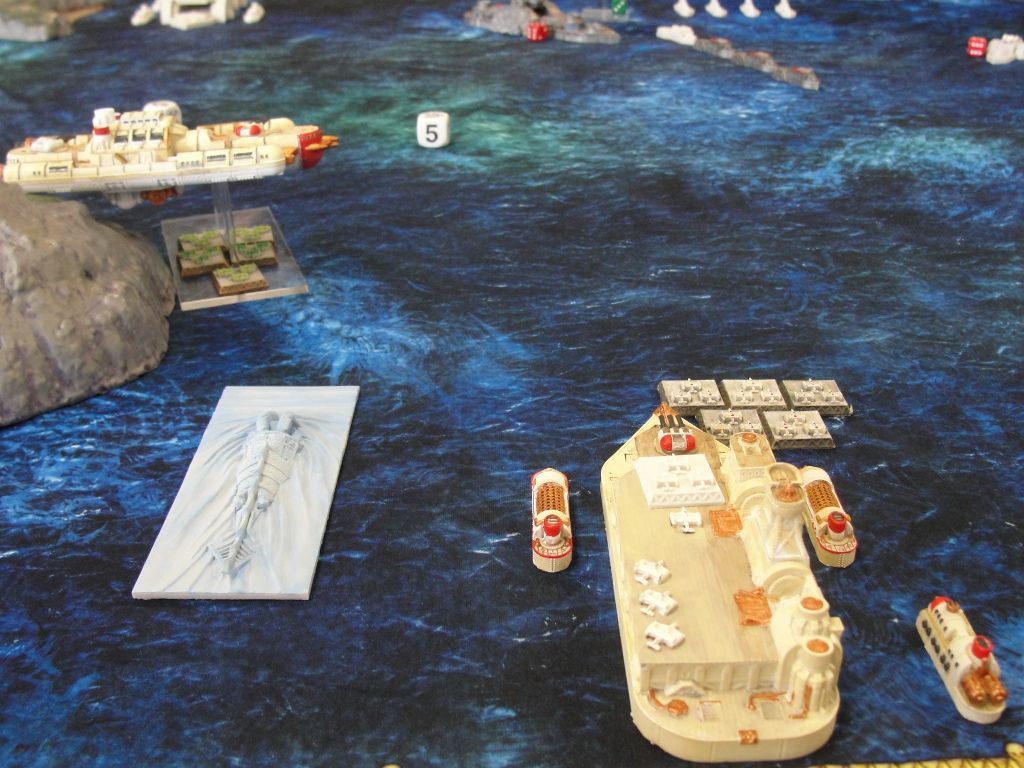
A squadron of Imperial torpedo bombers made a full-throttle advance and dropped torpedoes on a direct vector to the Enterprise, but several of the torpedoes which struck the side of the American Dreadnought failed to explode.  As the torpedo bomber squadron returned to the carrier Noto, a suspicious fleet admiral on the bridge of the Imperial carrier, removing his pair of battle goggles, scribbled a note in his log to make formal investigations of his ordnance offices at first opportunity after this engagement.


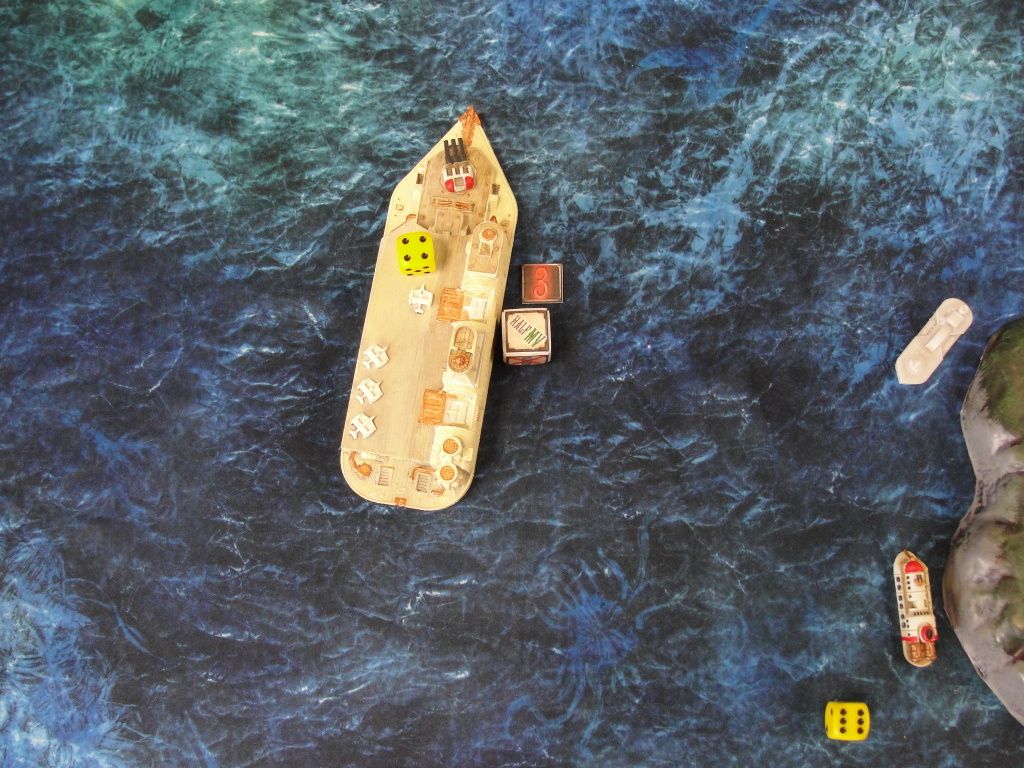
The torpedo bombers landed, rearmed, and launched for a second attack while the Imperial ships concentrated their fire on the American Dreadnought, with no discernible effect.  A squadron of Imperial frigates easily dispatched the American corvettes, and the Kaigun Shosho considered some frigate captains in line for promotion.  On the port side, the Ika which had been lurking alongside the carrier moved swiftly toward the American carrier, surfaced to attack, and then dived again to maneuver for a second attack.

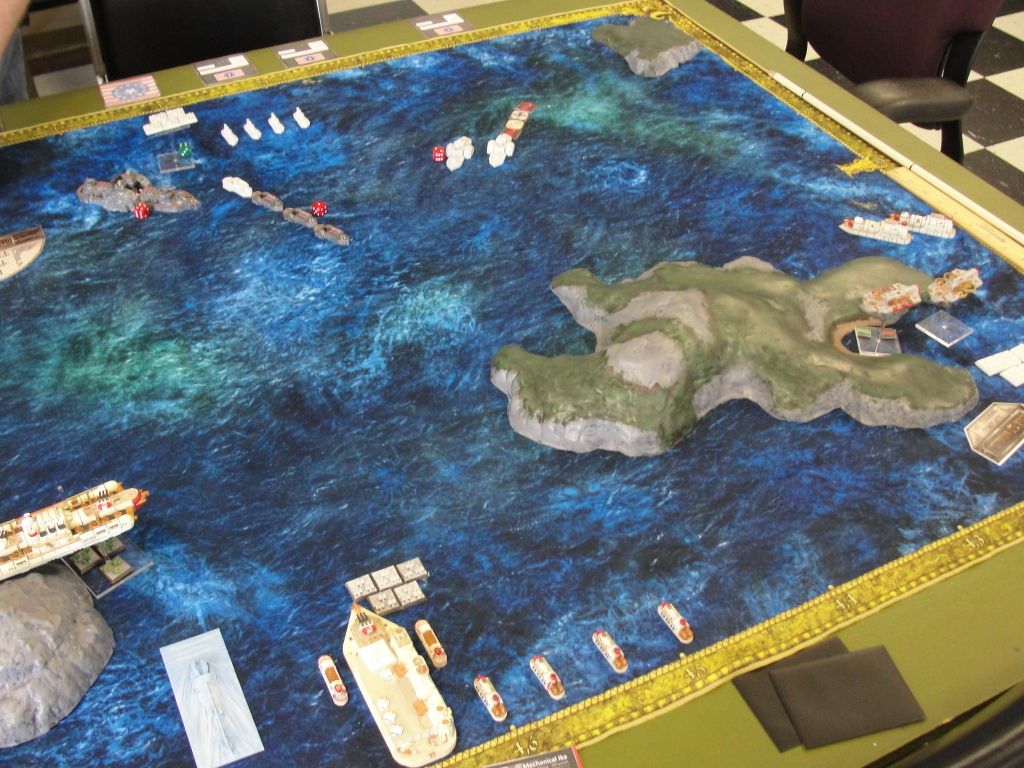
(Note:  the yellow dice were used to indicate activated squadrons, the number for the order during the turn in which they activated.)

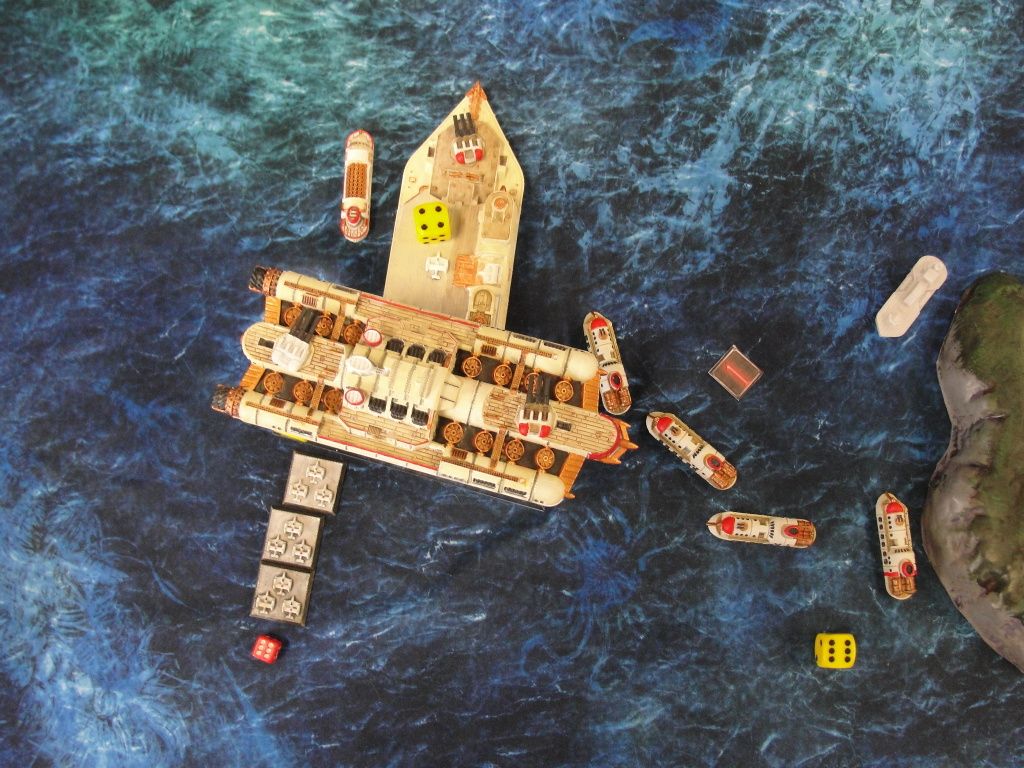
But then something terrible happened.  The Tsukuyomi War Gyrowas struck in several places by shells fired from the main turrets of the FSA Dreadnought, and one shell in particular set off a chain reaction of explosions which enveloped the entire flying warship in a blaze of fire.  The burning airship fell from the sky, crashing onto the aft deck of the Noto and everything from the bridge of the carrier was a flash of light and fire for several moments.


When the smoke cleared, amid the din of alarm klaxons, the surviving Imperial officers on the bridge of the carrier Noto surveyed the scene to find half of the fleet burning in the water.  Those frigates were gone, the torpedo bombers gone, and the Tsukuyomi War Gyro absolutely gone.  The executive officer reported severe damage to the Noto, particularly to the engines which could not be repaired (it seemed the engine crews were dead as orders to repair were not acknowledged).  But the Japanese would not give up the fight.  There was still a squadron of gunships coming around the flank, and the Kaigun Shosho decided to continue the fight and draw the attention of the Americans so that a flank attack may prove successful.


But the Imperial gunships had been intercepted by the American gunships, and there was small chance they would be able to move fast enough to assist the crippled carrier against the American Dreadnought.


By the end of turn 4 the FSA player had destroyed or damaged more than 70% of the Imperial battle group, winning the game which had started with more than 800 points per side by a margin of more than 30%.  As the carrier Noto sank into the waters, and the Ika (which had suffered engine damage and lost more than half original Hull Points from an attack by American torpedo bombers) submerged and attempted to escape, only the pair of Blazing Sun gunships and a single Scout Gyro remained in any condition to fight and turned to escape to the open sea.