I've been meaning to write this for months, but some of Stitch's recent posts have inspired me to finally put this together

. What follows is s step-by-step guide on how I painted my French fleet. I've used this same method on several other models using different palletes, as well.
First, I start with a primed model. For my french fleet, I went with the Army Painter Blue primer:
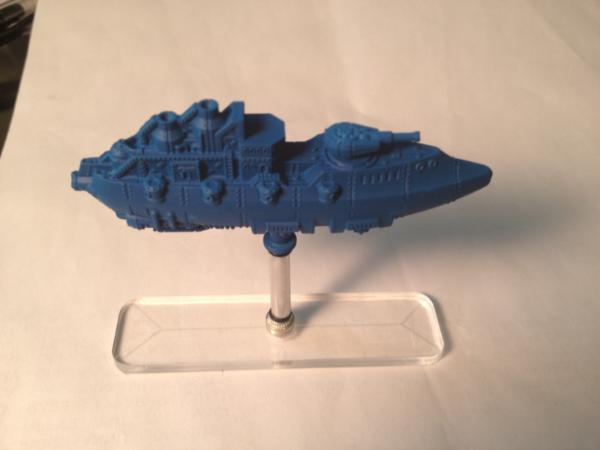
Next, I washed the model with an appropriately colored wash. In this case, it was GW's Asurman Blue. This step helps to bring out the depth of the detail in the model, which tends to get lost with a solid color primer like the one I'm using here:

After the wash had thoroughly dried, I then applied several layers of dry brushing, using steadily lighter colors to build up highlights:
Round 1 was a color just about the same shade as the primer, to restore some of the brightness of the base coat:
Next up came GW Enchanted Blue, to start picking out the edges:
And finally, a light dry brushing of Ice Blue to set the final highlights:
Next up, I painted the decking a light brown color. This will get darkened with a wash later on:
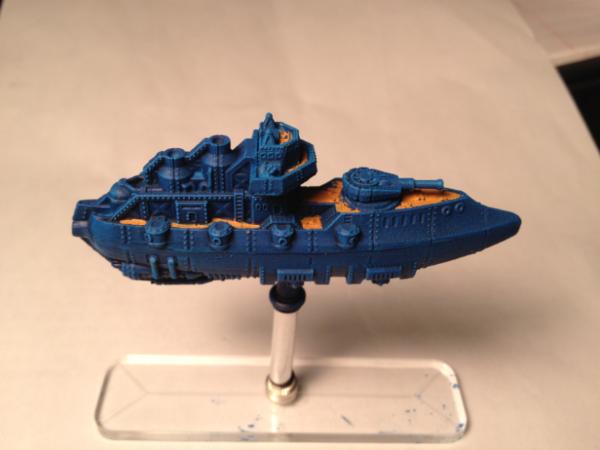
Now, this looked all well and good, but I wanted to break up the blue with some white camo areas, in a rough approximation of the RoF cover artwork. The first step was to use a light grey as the base for the white areas:
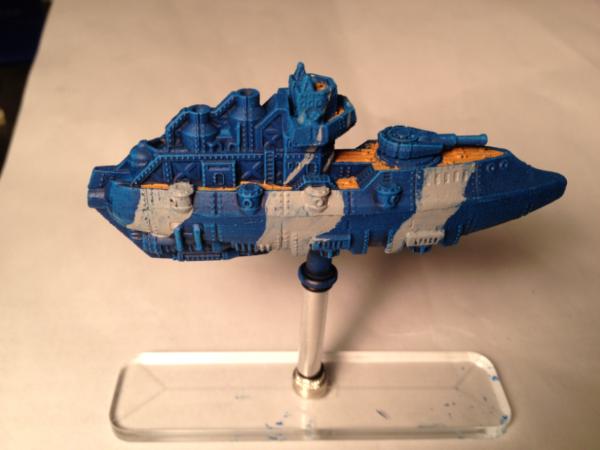
To give those areas a bit of depth, I then used a black wash to darken the recesses a bit:
Once that wash dried, I then built up the camo areas with several coats of white drybrushing. Using a white "foundation" paint (i.e., one with a heavy pigment load) helps in this process. The goal here was to try and leave a bit of grey around the edges of the camo patches, again to give a sense of depth.
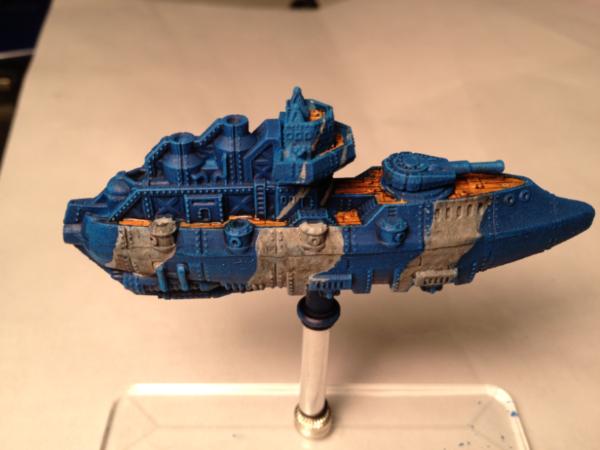
With the camo patches done, all that's left is the finishing touches; a brown wash for the decking, and all of the metalic bits such as the gun barrels, engine parts, piping, smoke stacks, and the like!
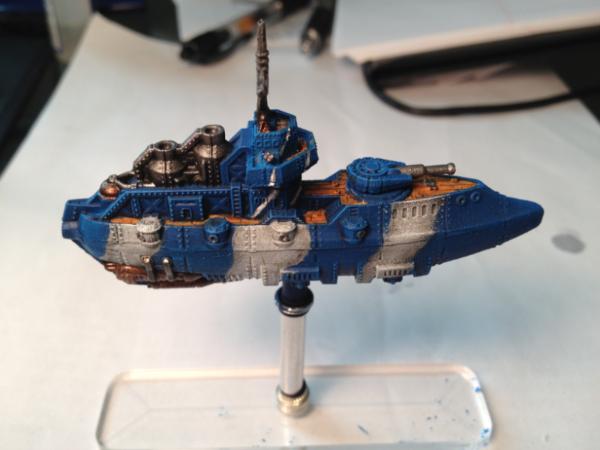
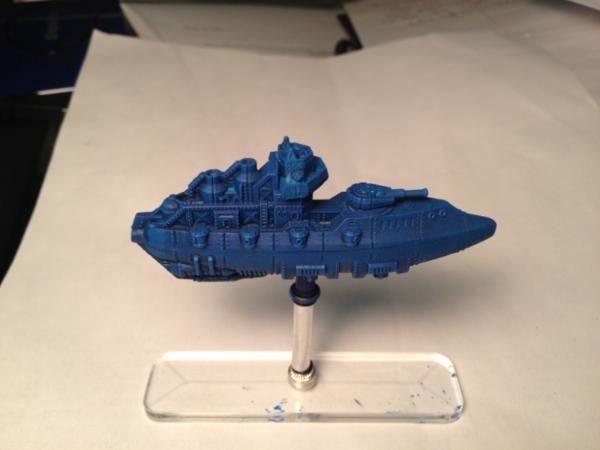
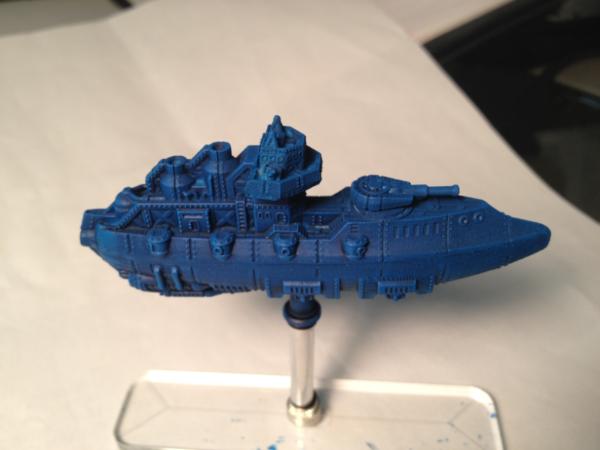
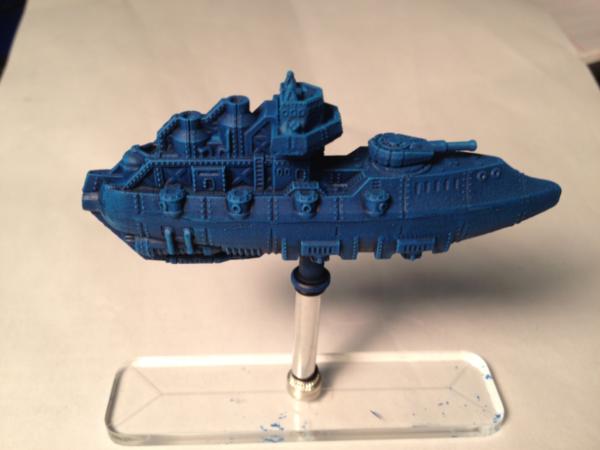
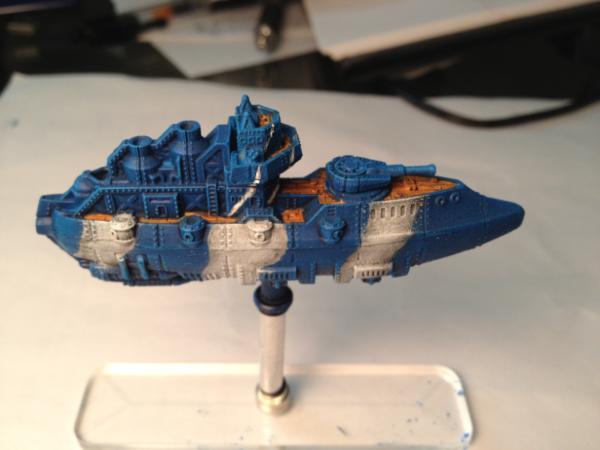
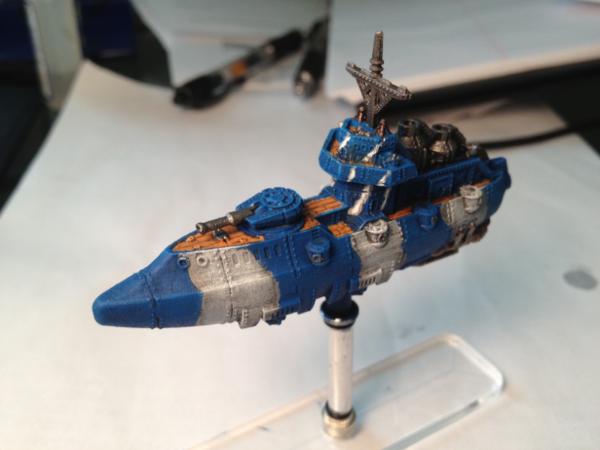
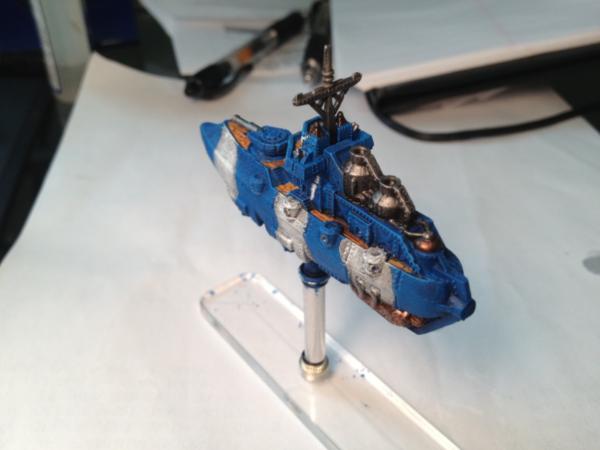
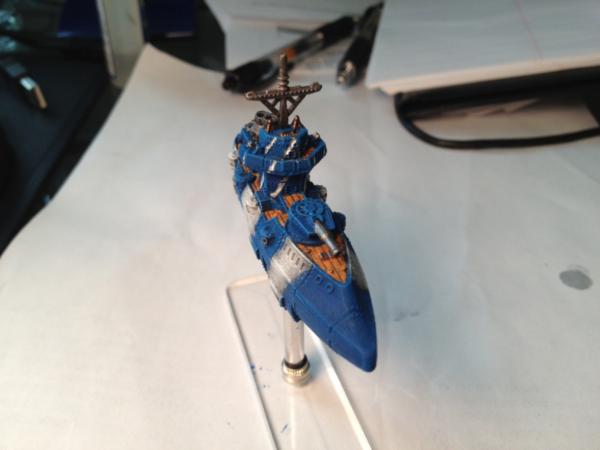
Here are few more shots of the finished product:
So, I would call this my standard painting method. This is pretty much the same method I've used for my Prussian ships as well, though in that case I modify the progression a bit as a start with a black undercoat. Since my undercoat is so dark, I have no need for an initial wash over the primer, and instead start building up the base coat with progressively lighter shades of grey. This method may seem a bit involved, but it really isn't too bad. I've found it particularly well suited to mass production, which is handy given how many frigates you wind up painting for DW!

