Author Topic: DW Water Base Tutorial  (Read 1967 times)

Ruckdog

  • Administrator
  • Admiral
  • *****
  • Posts: 3050
  • Number of Times Thanked: 189
  • Dive! Dive!
    • View Profile
    • Man Battlestations!
DW Water Base Tutorial
« on: January 26, 2015, 10:33:59 pm »
Many of Spartan's DW models come with molded water bases, with waves and wakes cast on to the base. On one hand, this makes the modeler's job easier, as it provides a lot of nice 3D detail without requiring any additional manual scuplting of the base. On the other hand, painting these bases to make a reasonable representation of water presents a very different challenge of painting the ship itself. Where as the ship is hard-lined, mechanical, and regular, the ever shifting surface of the ocean is constantly changing and flowing. After a bit of experimentation, I've stumbled upon  a reasonable method that is shown to good affect on this Sturmbringer-class submarine:


I'll do my best to describe how I did it!

First the materials:


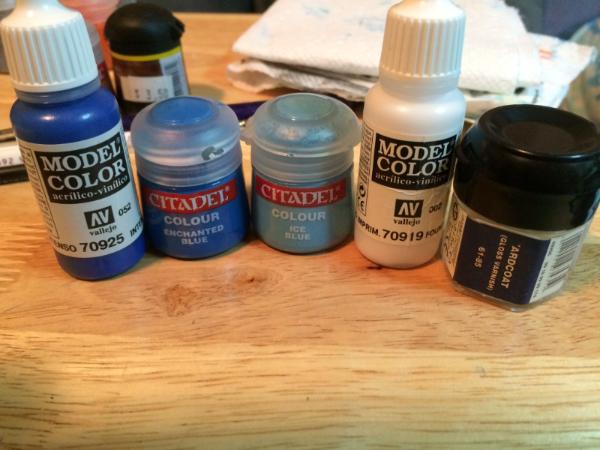
From left to right, I have a dark blue, a medium blue, a light blue, a white, and GW's 'Ardcoat gloss varnish. After I took this shot, I realized I also forgot to add the blue wash I used (GW's Drakenhof Nightshade).

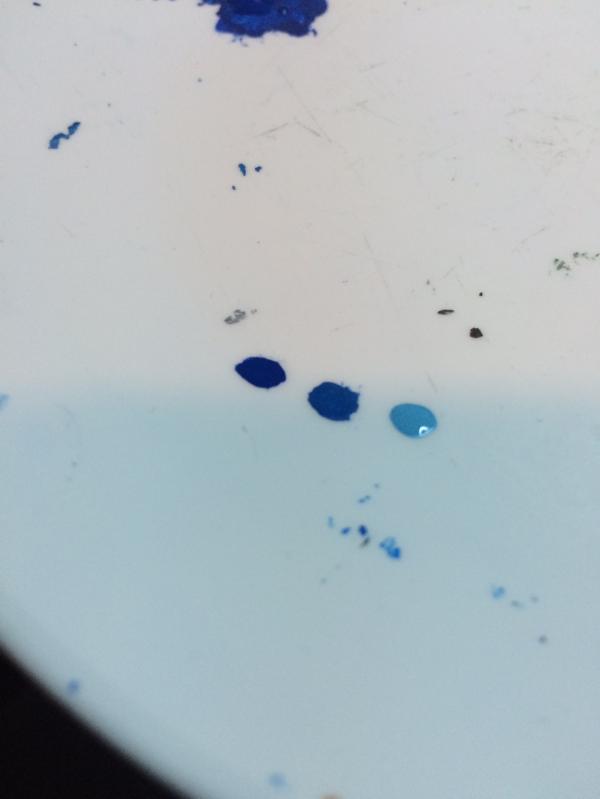
The heart of this process is to use gradually lighter shades of blue to build up a layered look to the base. I use three colors for my bases, but using more would probably give an even better result. Here are how the three colors I used look next to each other:


For this tutorial, I will be painting the base of a water-lined Metzger-class robot. Now, it seems obvious, but I should mention that in my method you paint the model itself, and then the base. That way, I don't have to worry about any paint I manage to slop on the base as I paint!
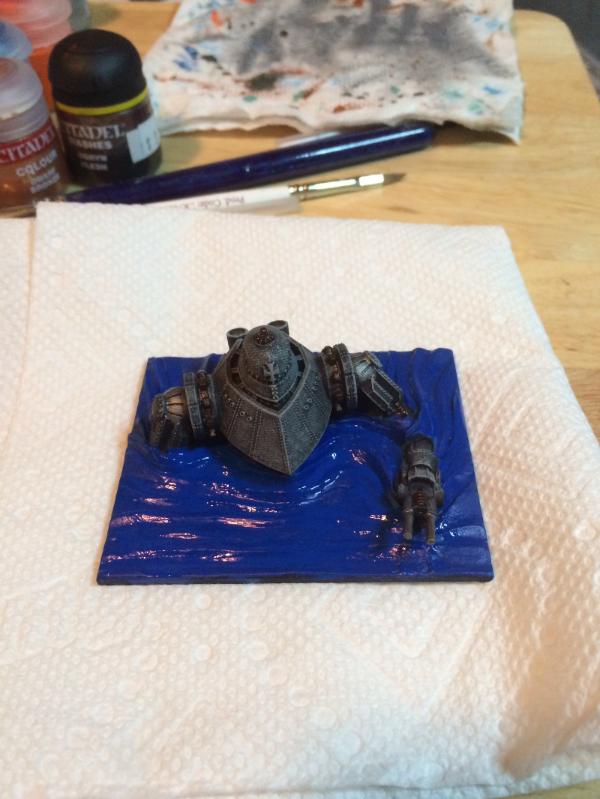
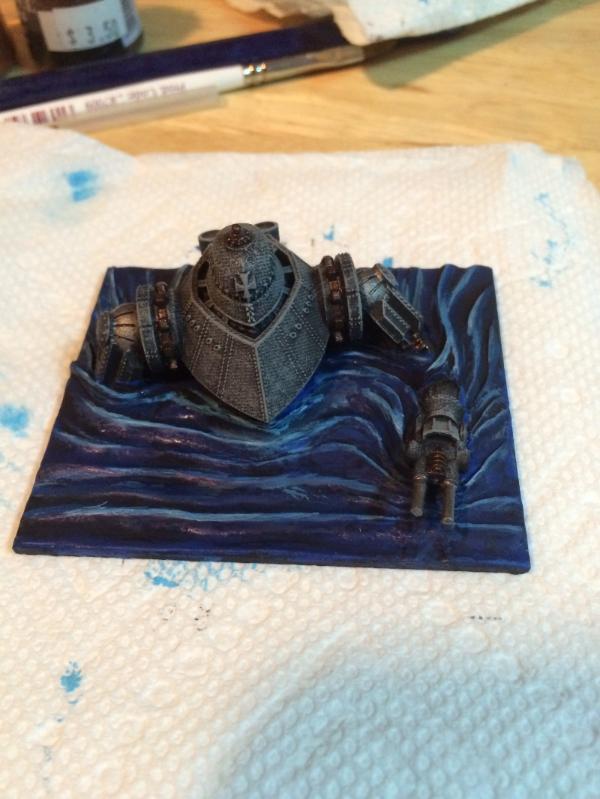
Step 1
The first step is to paint the whole base in the darkest shade of blue (the shine is due to me taking the picture before the paint had dried):


Step 2
The next step is to apply a wash to the base, to provide some shadowing to the troughs of the waves (again, the shine is due to the fact that the wash is still wet):


Step 3
After the wash has thoroughly dried, I start highlighting the peaks of the waves with the medium blue color. I dilute the paint a bit first, instead of just applying it out of the pot. This prevents me from just painting a hard-edged line of sorts on the base, and allows the paint to blend a bit with the darker colors beneath. I use my brush, a paper towel, and even my finger to spread out the paint a bit if the lines started to get to harsh:


Step 4
For this step, I repeated the process from Step 3 with the lightest blue. Like before, I diluted it down some to allow it to blend a bit better. I also tried to cover less of the wave crests than I did with the medium blue, focusing on the center of the waves and on the most disturbed areas of water around the model, like where his arm is breaking the surface. I then repeated the process again, with just a little bit of white paint mixed in with the blue. This final highlight was applied to just a few small areas that I really wanted to accentuate. This was the result:
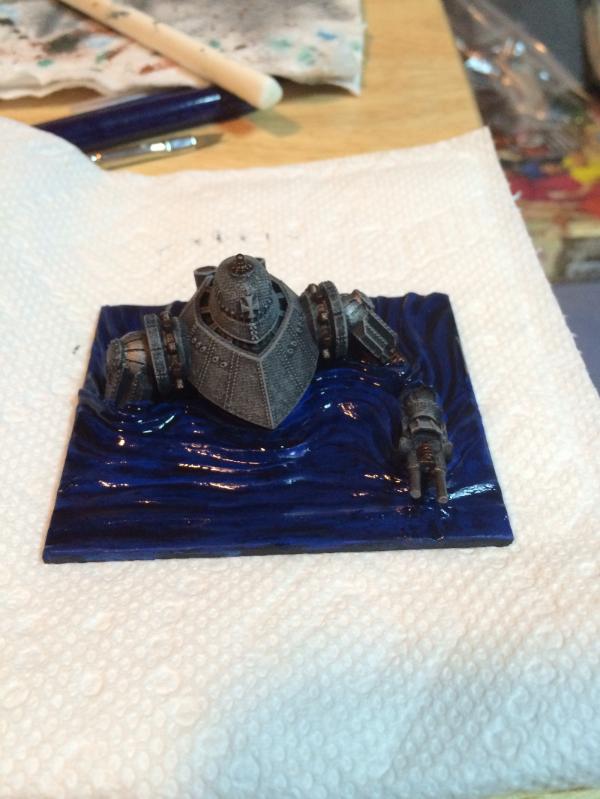
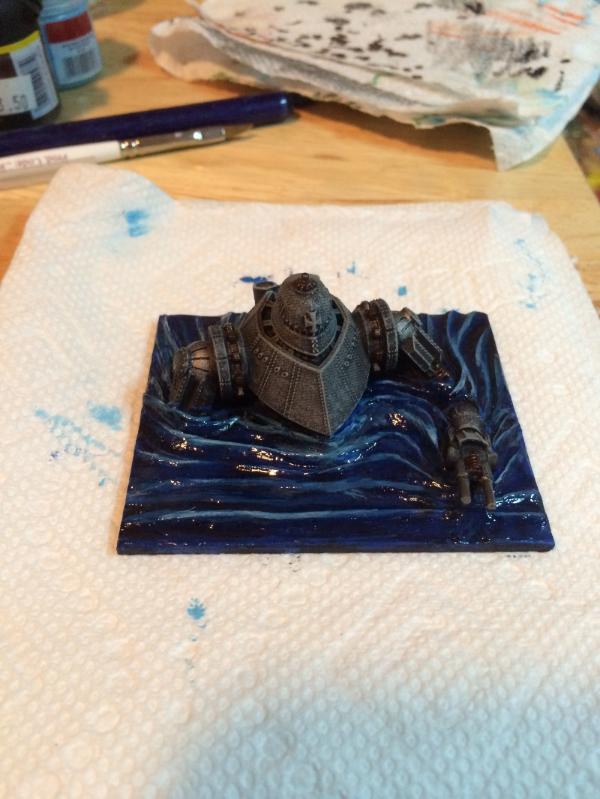


Step 5


The last step makes all the difference in my opinion! At this point, the surface of our "water" looks a bit like a ruffled piece of cloth, like a flag or cape. However, it doesn't look very "wet." This is where the gloss varnish comes in. This gives that wet appearance, and serves as a strong visual cue that what we are looking at is an inherently different surface than that of the model itself:


Conclusion

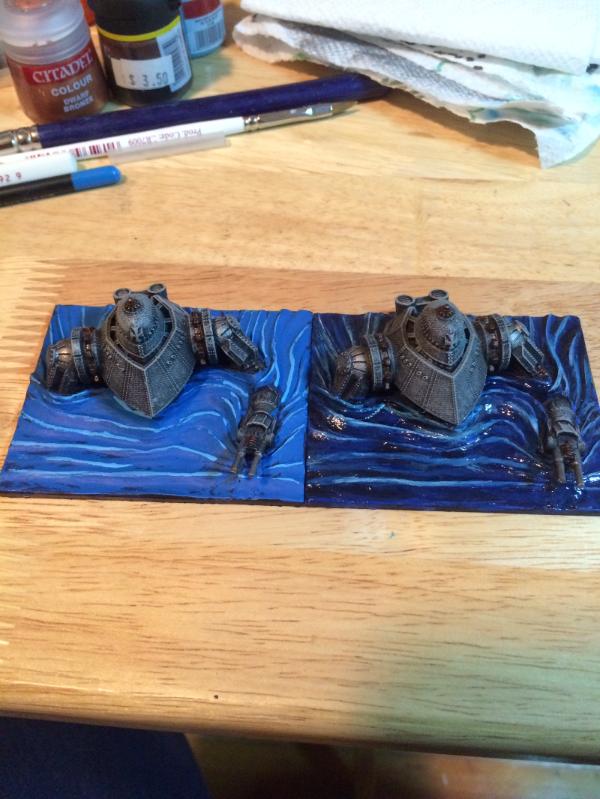
There you have it! I hope you find this tutorial helpful. As a parting piece of advice, I would encourage you to experiment and play around with this technique; it took me a while to get the hang of it. To see what I mean, take a look at one of my earlier efforts next to the Metzger I just re-painted for this tutorial:


Good luck!


Landlubber

  • Administrator
  • Admiral
  • *****
  • Posts: 2177
  • Number of Times Thanked: 63
    • View Profile
Re: DW Water Base Tutorial
« Reply #1 on: January 27, 2015, 12:31:19 am »
Thanks Ruckdog. Very helpful. I would have missed that wash step completely, but I like the effect it makes. It will be interesting to apply this technique to the Boston's base--instead of relatively smooth waves coming off the bow, the water is much more disturbed; I think "roiled" is probably the best word for it. Might try my hand at the RoF Epaulard subs first.
"Sometimes, you gotta roll the hard six."--Commander Adama

Ruckdog

  • Administrator
  • Admiral
  • *****
  • Posts: 3050
  • Number of Times Thanked: 189
  • Dive! Dive!
    • View Profile
    • Man Battlestations!
Re: DW Water Base Tutorial
« Reply #2 on: January 27, 2015, 07:39:31 am »
Yeah, I've noticed the same thing regarding the Boston. I was thinking of shifting my palette some to blue-greens, and then applying a final highlight of pure white to give the look of foamy water. It will take some experimentation!

Landlubber

  • Administrator
  • Admiral
  • *****
  • Posts: 2177
  • Number of Times Thanked: 63
    • View Profile
Re: DW Water Base Tutorial
« Reply #3 on: January 27, 2015, 12:41:27 pm »
Why blue- greens? Does seawater tend to change hue in a situation like that? You've spent far more time in Neptune's realm than I have, so I'll defer to your expertise.  :)
"Sometimes, you gotta roll the hard six."--Commander Adama

Ruckdog

  • Administrator
  • Admiral
  • *****
  • Posts: 3050
  • Number of Times Thanked: 189
  • Dive! Dive!
    • View Profile
    • Man Battlestations!
Re: DW Water Base Tutorial
« Reply #4 on: January 27, 2015, 02:11:57 pm »
There is some of that, yes. The more frothy the water gets, the greener it can get, as a result of the light reflecting and refracting differently through it. Also, water from different regions will tend to look a bit different; the turquoise colors I have in mind are more readily associated with the Caribbean, and I was looking at trying to use that to suggest a different AOR for my Americans vice my Prussians ;). Really though, just about any set of blues can be used; the "color" of water varies so much depending on the lighting, sediment color, level of biologic life, amount of disturbance, etc. that just about anything goes, as long as it "looks" right!

Landlubber

  • Administrator
  • Admiral
  • *****
  • Posts: 2177
  • Number of Times Thanked: 63
    • View Profile
Re: DW Water Base Tutorial
« Reply #5 on: January 31, 2015, 11:30:14 am »
Very true. I was taking a closer look at the Boston's base last night. That water is really frothy, especially for the partially-submerged version. That's going to be a challenge. Like I said, I'll try my hand at the Epaulards first.
"Sometimes, you gotta roll the hard six."--Commander Adama

Ruckdog

  • Administrator
  • Admiral
  • *****
  • Posts: 3050
  • Number of Times Thanked: 189
  • Dive! Dive!
    • View Profile
    • Man Battlestations!
Re: DW Water Base Tutorial
« Reply #6 on: January 31, 2015, 11:44:10 am »
Probably a good call. Here is how mine came out, using the method I detailed above:


Landlubber

  • Administrator
  • Admiral
  • *****
  • Posts: 2177
  • Number of Times Thanked: 63
    • View Profile
Re: DW Water Base Tutorial
« Reply #7 on: January 31, 2015, 12:05:19 pm »
Oooh, those look good. Figures you'd give a little more TLC to your sub models, though.  ;)
"Sometimes, you gotta roll the hard six."--Commander Adama