This is the first of what will probably become a series of posts on me and my friend Matt’s play-through of Hurricane Season, the first campaign book for Dystopian Wars that came out way back in 2012. I have to say, I’m really excited to be getting into this campaign! Matt and I are not going to be playing it exactly as laid out in the book, though; we are going to be making some tweaks to help the campaign conform better to our model collections, and to work better with DW 2.5. Before we get into that, though, a quick history lesson might be in order!
Hurricane Season: A Look Back
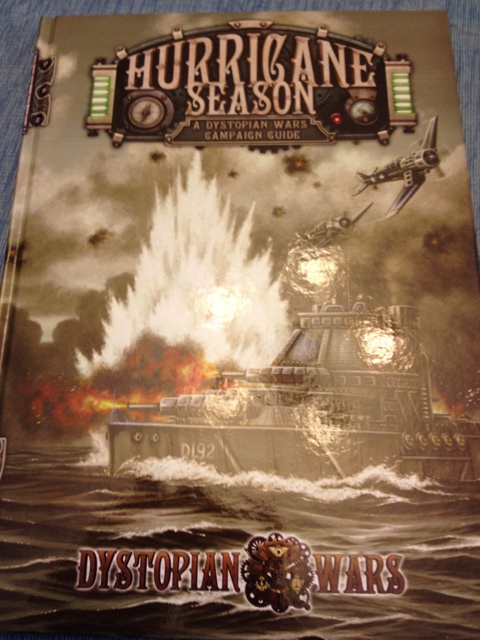
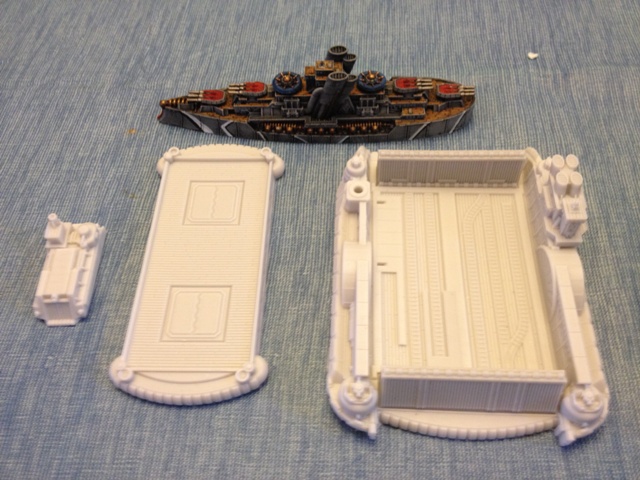
For those that aren’t familiar, the Hurricane Season book details an effort by the Empire of the Blazing Sun (EotBS) and Prussian Empire (PE) to invade the Caribbean, where they were contested by the Federated States of America (FSA) and Kingdom of Britannia (KoB). Also in the mix was the Covenant of Antarctica (COA), which was actively working against all the other parties. I covered it’s initial release here on the blog, though that was quite a while ago! Looking back, the Hurricane Season release was a big moment for Dystopian Wars. First, it was huge for world-building, as it was easily the biggest dose of fluff that had been released up to that point for the game. Fully two thirds of the book is dedicated to a detailed account of the events from the campaign, to include detailed orders of battle for all the major participants. Also included is a series of new game rules, for things like weather and Campaign Points, and most importantly for our purposes, a series of missions that players can play to re-fight some of the major battles from the campaign. The book also released alongside a range of landing ships and platforms, enabling players to conduct fully-fledged amphibious operations in their games of DW.
Our Plan
Forces
Playing all 6 missions from the Hurricane Season (HS) book, there are a lot of different forces needed! The book has a total of 5 forces participating, some with land forces, some with naval, some with both. The breakdown looks something like this:
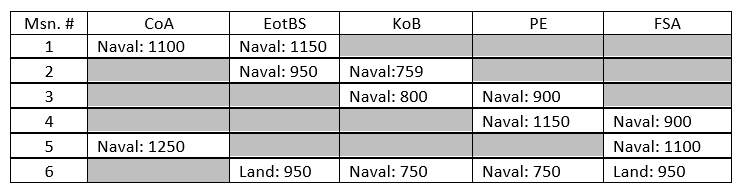
This set-up is great for gaming groups that have different players, each with one of the forces needed. Given that it’s just the two of us, having painted forces for all 5 of the factions involved is a bit if a daunting prospect! Instead, we decided to simplify the matrix down and make our campaign strictly FSA vs. EotBS and PE, like this:
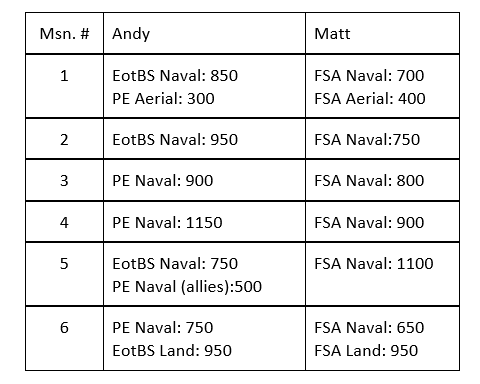
This simplifies things somewhat, and also maximizes the extent to which we can use our existing collections! Note that instead of trying to follow the exact force compositions laid out in the HS book, we are using the alternate force comp option that is based only on point totals for the forces involved.
Mission Modifications
Thanks to the changes to the forces involved, some minor updates to the missions are needed to re-align the fluff to the models we are actually using. For the most part, the objectives of the missions themselves are going to be kept the same. One thing that had to be addressed is the question of local air support, since that was not addressed by the book’s alternate force composition rules.
- Scenario 1: Battle off Cape Horn
- Background: The F.S. Navy, having been tipped off by intel provided by the Britannians, has sent Task Force Matt (Placeholder name) to engage a Blazing Sun reinforcement fleet that is advancing into the Atlantic to support further offensive operations in the Gulf of Mexico.
- No local air support.
- Scenario 2: Delaying Action
- Background: Despite the best efforts of TF Matt, the Blazing Sun has broken out into the Atlantic. The only thing between them and the Gulf of Mexico is the under-strength FSA South Atlantic Squadron, operating out of the Britannian base in the Falkland Islands. Rather than risk their flank by bypassing this force, The Blazing Sun fleet decides to engage the Americans before proceeding north, and succeeds in bringing them to battle near their base.
- FSA has 2×5 SAS of local air support.
- Scenario 3: Battle of the Bahamas
- Background: The PE has dispatched a large naval Kampfgruppe and sent it across the Atlantic to support the Blazing Sun-led invasion of Cuba. In an effort to forestall the linking up of PE and EotBS forces, the FSA has engaged the leading elements of the Prussian force in the seas off the Bahamas.
- FSA has 1×5 SAS of local air support.
- Scenario 4: Operation Hammerfall
- Background: A Prussian detachment moves in to bombard the coast of Florida. By doing so, the Prussians hope to compel the FSA to pull forces back to defend their coast, thus weakening the FSA forces that are interfering with the advance of PE forces into the Caribbean.
- FSA has 2×5 SAS of local air support
- Scenario 5: Battle of Guantanamo Bay
- Having successfully rendezvoused in the Caribbean, a joint PE-EothBS taskforce approaches the coast of Cuba in order to weaken the FSA defenses in preparation for the landing of Blazing Sun ground forces.
- FSA has 2×5 of local air support
- Scenario 6: Operation Ryuza
- EotBS ground forces, supported by PE naval units, attempt to land on Cuba, where a dug-in FSA garrison awaits. The FSA has rushed local naval forces to the area in an attempt to interdict the invasion flotilla before it can land, and reinforcing armored units are racing overland to the beachhead, hoping to bottle up any Blazing Sun forces that reach the shore.
- FSA has 2×5 of local air support.
Commanders
One of the neat features that I really like in the 2.5 rules are the Commodore generation tables. This seems like an ideal way to make some personalized commanders for our forces that can gain new abilities as the campaign progresses. At the start of the campaign, we will get 3 rolls on the Commodore Trait tables, with the Commodore Trait provisions in the ORBATs being in effect (ie, a Prussian Commodore may always take the Send In my Best Aggressive trait, etc). For every 15 Campaign Points a player earns during the campaign, they can make one additional trait roll for ONE of their commanders. This way, our commanders will gradually gain more abilities as time goes on, showing they are gaining experience as the campaign progresses! Commanders are not permanently assigned to any one ship, but can be assigned to any large or massive model for each battle. We are also planning to use Sub-commanders; Any large/massive model in the campaign can be assigned a sub-commander if desired. The sub-commander will be assigned and their trait rolled for before each scenario. We each plan on rolling up the following Commodores for our forces:
- Andy
- EotBS Naval Commander
- PE Naval Commander
- EotBS Land Commander
- Matt
- FSA Naval Commander
- FSA Land Commander
We also plan on coming up with a simple background story for each commander, and finding some kind of portrait (either from DW art or from historical photos) to represent them.
Conclusion
With our planning phase complete, we are just about ready to start playing our campaign! I plan on posting a few more posts about some of the modeling that we’ve been doing to get ready for the various scenarios, as well as full reports for each scenario after we’ve played it, so stay tuned for that coverage. Until next time!