
I know, I know, you are probably thinking to yourself “Not this again!” However, my most recent game of FSA has given me reason to go back and take another look at the adjusted lists I made last time. Let’s get started!
Lessons Learned
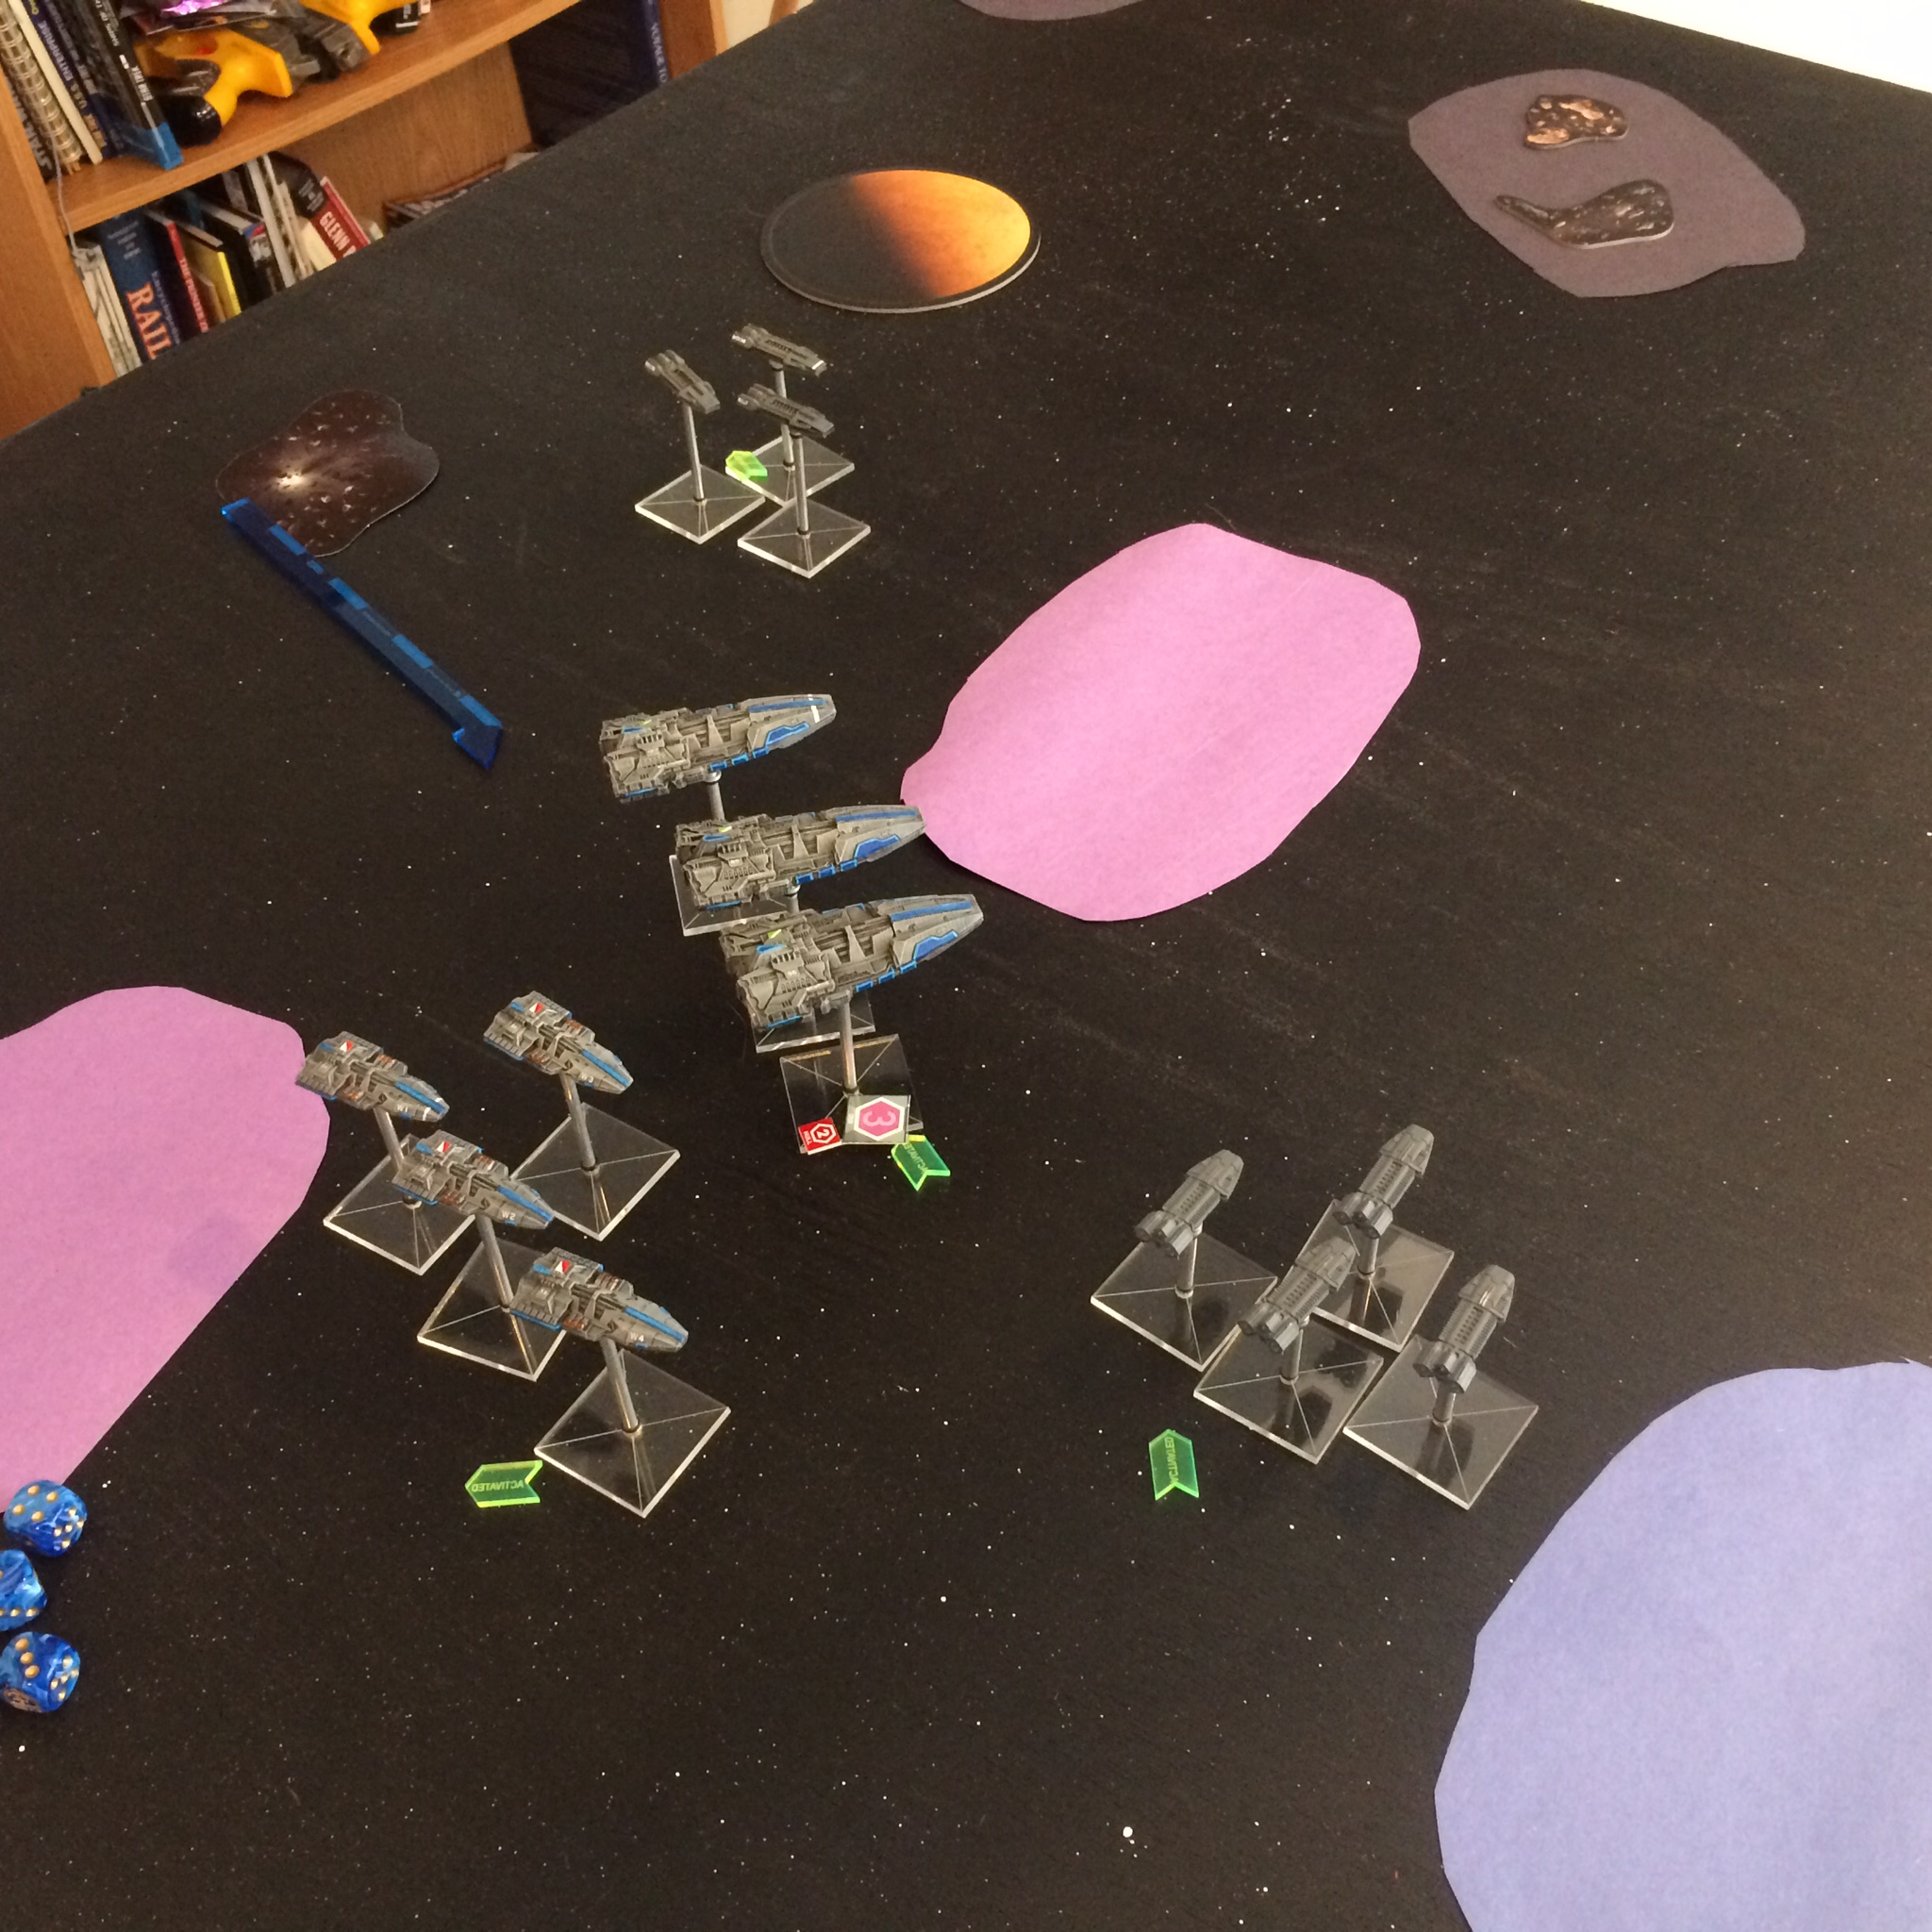
So, what was it about my last game that go me thinking? Well, first of all, since we were playing the Escalating Engagement scenario from the FSA rule book, my opponent and I had to start all of our Tier 1’s in reserve, and we couldn’t use shunt entry to bring our forces on. As a result, we couldn’t use TAC cards for the first two turns of the game. Likewise, much of our firepower was off the board. Now, to me, this has two big implications. First of all, I should think carefully about putting my Admiral in reserve if my game plan is going to rely on TAC card usage to any degree. Secondly, I need to also be careful about just how much of my fleet I put in reserve; with recent event reports saying that many tournament games only get to turn 2 or 3, there is a good chance that I could hamstring myself by putting too much of my fleet out of action for what might turn out to be much of the game. Another thing that I wound up finding myself missing were my nuclear torps on my cruisers and battleship. There were a couple of cases in this game where having that option could have resulted in much more damage being inflicted on the opposing fleet. Finally, I think that I will need to do something with the partial Frigate squadron; I just wasn’t happy with their reduced dice output.
CONOPS Revisited
As I discussed in Part 2, my basic CONOPS employs what was later referred to in the forums as the “Hammer and Anvil” approach. Essentially, I start a goodly chunk of my fleet (the “Anvil”) on the table, and place the rest in reserve to drop in and hit the enemy from two directions (the “Hammer”). I think I’m still going to try for this approach, though I am thinking that I may not put both the cruisers and the battleship in reserve. Instead, I’m thinking of putting just the Battleship in reserve, depending on the table setup and scenario, so that I can get more firepower to bear at the start of the game, as the cruiser squadron actually has more dice to throw at range than the BB does. This will tend to weaken the hammer in favor of strengthening the anvil, so I would need to be smart about how I use the hammer to get the best effect from it.
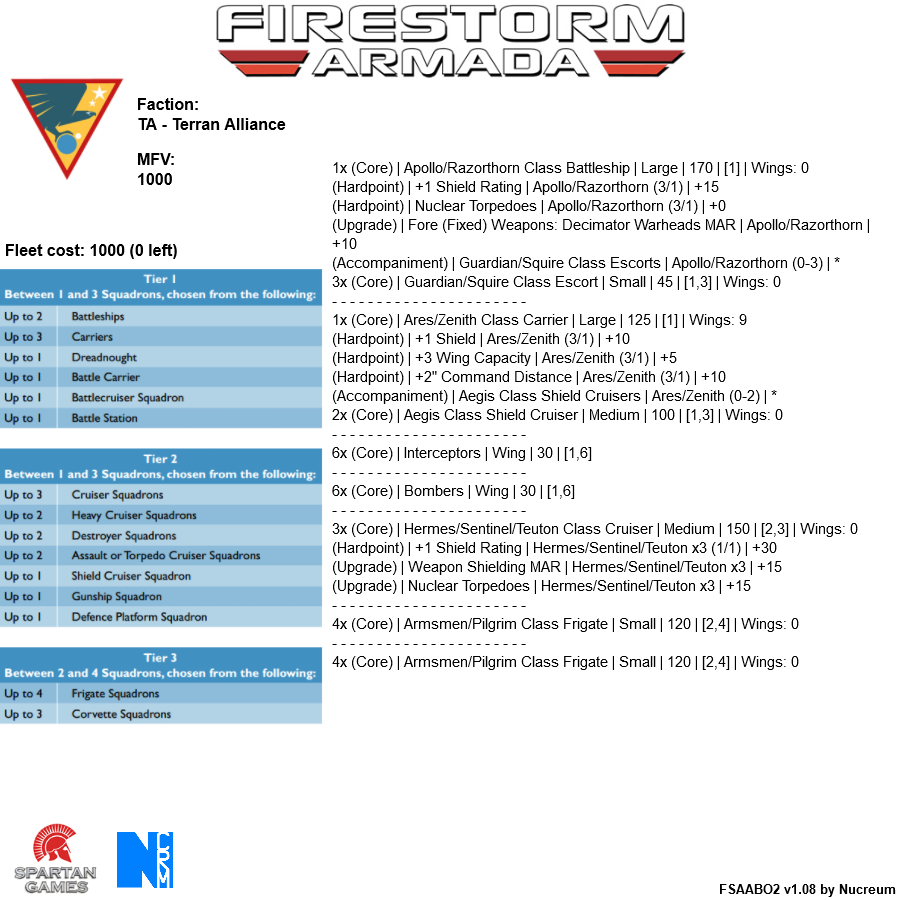
Revised Fleet List
So, taking into consideration my two test games, here is the third version of my Battleship-Carrier Adepticon list:
Employment
So, as I mentioned before, the BB and its escorts are the Hammer; they will be put in reserve and shunted in to hopefully wreak havoc on the enemy up close. The escorts will probably not live long; however, since I’m dropping the BB into close range, they will force my opponent to deal with them before launching bombers, torpedoes, or boarding at me. That may very well spare my BB a couple of points of damage, as the escorts will require probably about 8 AD or so each to reliably knock out. The BB’s loadout was designed to improve it’s performance in this role; the Decimator warheads will complement the Nuclear effects nicely if I get a Critical, and the extra shield will hopefully help the ship resist the inevitable waves of counter-fire.
I plan on making the Carrier my flagship, as it will start on the board. This will put my Admiral in play at the start of each game, which will assist with TAC card usage and reserve rolls. The Carrier’s loadout of an additional shield, +3 wings, and +2 command distance are all designed to help it serve as the defensive bulwark for the Anvil, ably aided by its two accompanying Shield Cruisers. The Cruiser squadron will operate closely with the Carrier, fending off enemies that get too close while being able to enjoy the PD boost from the SRS and the shield boost from the shield cruisers.
Instead of 2 full and one partial squadron of frigates, I decided to go with just the two full squadrons and use the 75 points from the partial squadron to feed upgrades to the rest of the fleet. This limits my flexibility somewhat, as I lose an activation out of the list, but I think the upgrades will counteract that somewhat. The frigates will probably mostly start on the board, though I can think of some instances where it might be useful to reserve one squadron either to support the hammer or to drop in on an objective.
The End?
While I could probably tinker with this list until the end of time, I think at this point I’m happy enough with it to freeze it as-is. I am planning on tweaking my other list to be a Dreadnought list instead, because, hey, Dreadnoughts! For this list, though, I am satisfied with it’s current level of refinement. Adepticon, here we come!
Until next time…
Pingback: Event Report: 2nd Schaumburg Prime Offensive | Man Battlestations Blog